Pages

Showing posts with label cooking. Show all posts

Thursday, February 27, 2014

Blue and Gold Cake - Olympic Theme

It's that time of year again - Blue and Gold Banquet for Cub Scouts!!  This is the last year I will have to make a cake, because my youngest son will turn 11 in 2 weeks!  I'm a little sad, but mostly excited. haha :)
 
Well, the theme this year is the Olympics!  So fun!  We decided we wanted to do torches for our cake this year.  Way easier than decorating a cake, in my opinion.  :)
 
We baked cupcakes in sugar cones, made little Olympic papers to wrap them in, and then just squirted frosting on top - super easy, huh?
 
Here's how they turned out....
 
 
Okay, the really hard part, was finding something to hold them all in.  I tried cutting holes in a disposable pan, (That was how I baked them.) but then remembered we had this handy little put-together organizer thingy.  It's a little big - not sure what that will look like on the cake table, but it saves me a HUGE headache!  Whew!


Here is how I baked them...

 
One little tip - DO NOT FILL THE CONES TOO FULL!!  My first batch looked like volcano cupcakes instead of torches.  Not pretty.  You will want to fill them only 1/2 way full - leave a good 2 inches or more because they seriously expand!  Also make sure they are standing straight up - that helps too.  I baked them at 325 F for about 15 minutes.
 
I just used a box cake mix, and a can of lemon frosting.  I added a couple drops of red food coloring in and didn't even really stir it, just scooped it into my frosting bag.  It turned out a little pinkish in spots, but it looked way better than the yellow plain.  I added red sprinkles on top and that was it!

 
Well that's it!  I am also in charge of a little Olympic craft, so I bought a package of large craft sticks, and I am having the boys design and decorate their own "snowboards" using markers.  I think it will be fun for them to do, and pretty easy for me!
 
Let the games begin!  Thanks for stopping by!  :)
 
Photobucket

Friday, April 26, 2013

S'mores On A Stick

These are the treats I made for our Young Women's Camp Kickoff. They turned out really cute, and apparently they were delicious, too.  :)
 
 
Here is what you need:
 
pretzel rods
jumbo marshmallows
1 pkg chocolate chips (I used milk chocolate)
vegetable shortening
graham crackers
 
Carefully push the pretzel rods into the center of the marshmallows until they almost poke through, then lift up slightly so they are secure.
 
Put some graham crackers in a ziploc bag and crush with rolling pin until crumbs are fine.  Pour into small bowl.
 
Melt 1/2 the bag of chocolate chips with a couple tablespoons of shortening in the microwave.  Stir until smooth.
 
Dip the marshmallows into the melted chocolate, and roll in graham crackers.  If you are making more, you can repeat with the other half of the chocolate chips.  (I made about 24, and I used all the chocolate!)
 
I set them in a cup and put it in the fridge until the chocolate was set. 
 
You can serve them just like that if you want - I put them in individual plastic bags...
 
and then I displayed them in these cute buckets!  Fun, huh?  (They looked much better in person.)
 
Thanks for stopping by!
Photobucket

Saturday, February 23, 2013

Campfire Cake

Well, it is that time of year again - the Blue and Gold Banquet! :)  Last year, I took the easy way out of the cake-making thing, and made a fake one.  You can see it here.  This year, I had a little more time, and so I decided I would at least try something creative.
 
Searching around the internet, my son I saw some really cute campfire cakes and we I decided that is what we I wanted to make. (Because we all know that it's really the moms who do this, right?) haha
 
I had about three different cakes that I liked, so I picked the best of each, and just kind of threw it all together.  It doesn't look quite how I pictured it in my head, but oh-well.  Here it is:
Okay, first of all - don't look at the extremely distracting cake plate.  I don't have any good round serving trays apparently.  Second - I did make 2 layers, but they are super thin, so it looks like one layer.  (I even made one layer blue swirl and the other layer yellow swirl.) 
 
I put rock candy around the base and a few on top, along with Pirouette cookies, crushed oreos and crushed graham crackers.
 
The flames were made by melting hard candies in the oven, and then cracking them into shards.  Jolly Ranchers work the best, but they don't make yellow or orange, so I had to improvise. :)
 
I stuck a battery-operated tea light in the center, and turned it on right before we got to the banquet.  It was so cute, it really looked liked flames!
 
Well, there you go - our campfire cake!!  We really thought it turned out cute!
 
Thanks for stopping by!
Photobucket

Tuesday, October 30, 2012

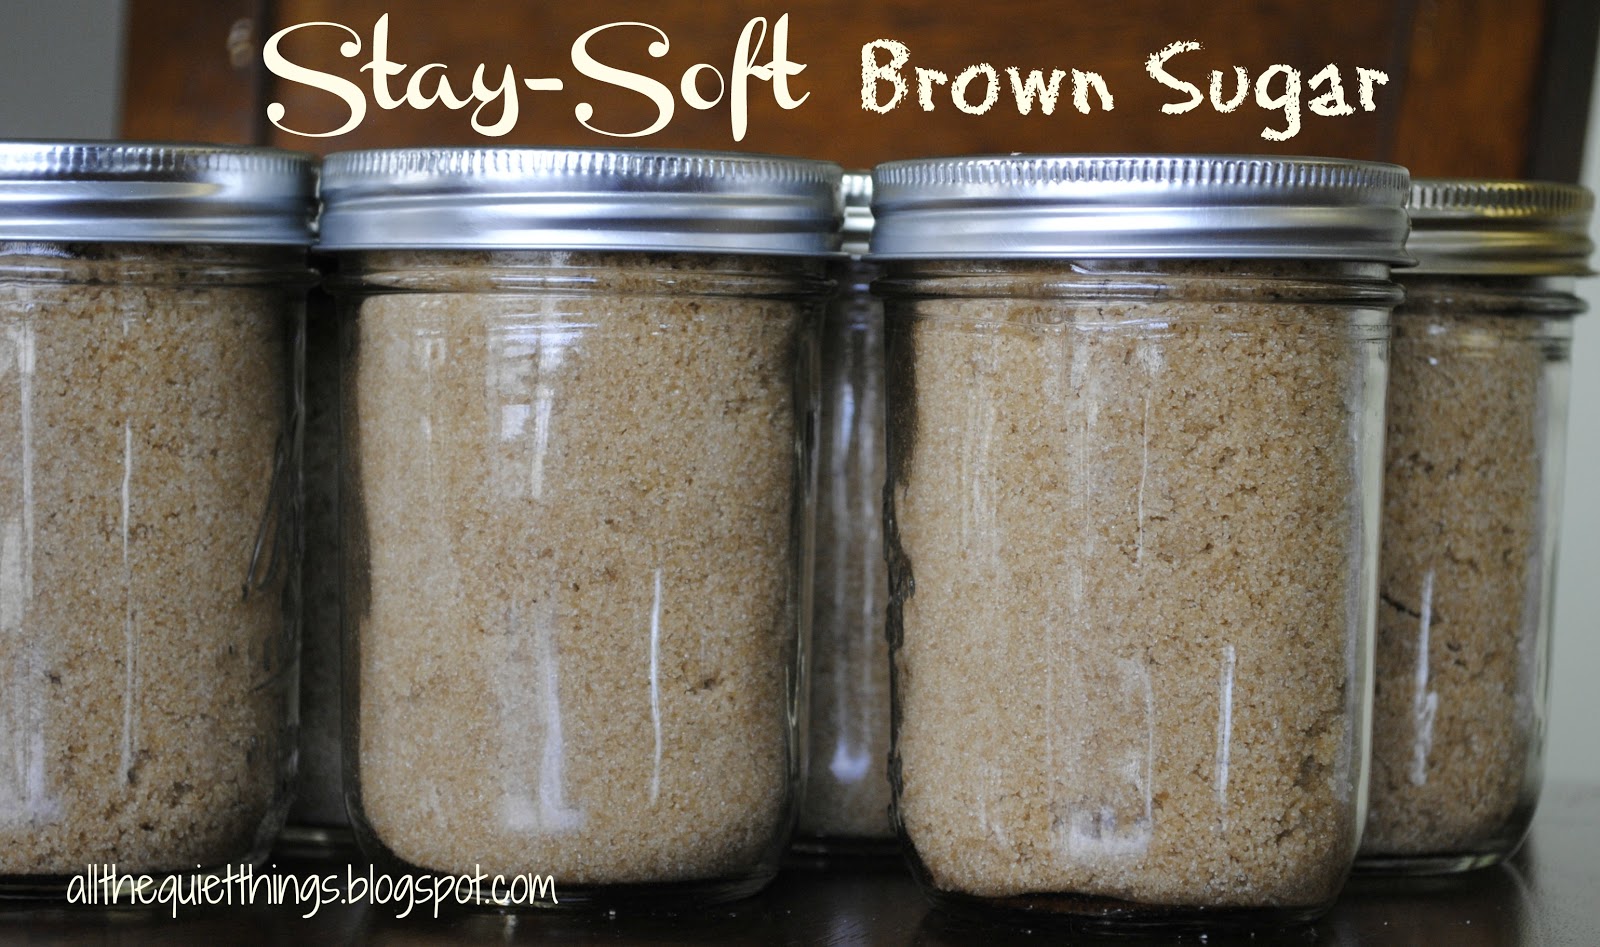
Stay-Soft Brown Sugar

Everyone has "tricks" to keep their brown sugar soft. I have heard them all, and even tried them all. (Anyone ever put a piece of bread in your brown sugar container?) And guess what? They NEVER work! Sorry, but they don't.
 
A million years ago (maybe like 10) when we got our vacuum sealer, I started putting my brown sugar in jars and then sucking the air out - it worked great!  Then, I got lazy and stopped using the sealer.  It STILL worked great!!  I have been putting my brown sugar in jars ever since, and never ever ever had one speck of hardened brown sugar.  Seriously.  It's that easy.  Who knew?


When I open a new bag of brown sugar, I just pour as much as I can into a wide-mouth jar* and then poke it down with the tip of a spoon. I don't pack it tight, but kind of jab at it, so it fits better and gets any lumps out.  I keep doing that until it's almost to the very top.  Then I just store them in my pantry to use as needed.
 
 *I use wide-mouth so it's easier to spoon out.  And I also like the smaller jars, but you really can use any kind you want.


So that's it!  I recently converted my sister to this jar method and she loves it!  Try it and see what you think.  
 
Photobucket

Tuesday, September 25, 2012

2 Week "Power Cooking"

I have done what I call "Power Cooking" for years, but it was always for myself. (Chicken breasts, sweet potatoes, etc. so I could have healthy food to eat during the week.)
 
I never thought of doing it for my family! Ha! Well, people have inspired me - and I thought I would finally give it a go. :)  I have teenage boys in sports/school activities, a husband who works late, a 9 year-old and a 2 year-old who can't wait that long for dinner.  It was really hard to make dinner when everyone eats at different times!
 
So after reading lots of blogs and checking out books from the library - I decided to start small and just try the 2 week meal idea first. 
 
My family is not big on repeats, unless I have a few weeks in between, so I actually printed out a blank calendar and made a 6 week menu.  I made 11 meals for the freezer (we'll have baked potatoes, hoagies, etc. on the other nights, so I didn't need to freeze anything for that.)  So some of the meals that I had doubled, will actually be used later in the month.
 
Note: These are not complete meals that you just take out of the freezer and cook.
I decided I wanted to use my family's favorite meals, that I would be making normally, but just figure out a way to make them easier and have most of the cooking done ahead of time.
 
These look really gross, sorry - I took the picture after everything was frozen. I was worried that they would sit out too long otherwise.
 
Next time I do my power cooking, I think I will do a whole month (yikes!) and see how that works. :o
 
Here is my menu:
Pork Tenderloin (2 meals)
Old-Fashioned Chicken Noodle Soup - I froze just after you shred the chicken, before you add noodles and milk.
Beef Enchiladas (Just the filling, because the tortillas get really soggy if you make it first and freeze it. Trust me - yuck!)
Chicken Marinade (2 meals worth) - I just froze the chicken right in the marinade, so it will marinate as it thaws and then we just throw it on the grill!
Pasta e' Fagioli Soup - As with the chicken soup, I froze it before adding the pasta.  I will just let both soups simmer and warm up awhile first.
Baked Potatoes with Chili
Lasagna (2 pans) - Assemble and freeze in a disposable pan.  Easy peasy.
Chicken & Wild Rice Soup (I froze the chicken and veggies to assemble in the crock pot.)
Hoagies
Tacos (Meat only) - Brown meat, add seasonings, cool and freeze.
California Wild Rice Salad (I froze the cooked, shredded chicken only, for this recipe.)
Potato and Ham Chowder - Could freeze the chopped onions and ham - I didn't.
Homemade Mac-n-Cheese (my kiddos LOVE it)
1 night to eat out - when I do my next day of Power Cooking!!
 
I even went crazy and cooked bacon to freeze and also made cookies! (I freeze the dough in balls, so we can just pop them in the oven anytime.)
 
 
Okay, so I just made the oatmeal cookies today - whatever. haha :) I think I will always freeze extra any time I am in the 'baking mood', especially for the holidays! 
 
So you see that nothing repeats, and I actually have some meals to use for next time!  Yay!
 
I am really excited to do this again - it's kind of fun to have all the hard work over and done with.
 
It only took me about 4 hours, but I will say that my back was killing me and the kitchen was a total mess! haha
Which is why I plan on eating out the night I do my power cooking! :)


Have fun cooking, everyone!!
Photobucket
Related Posts Plugin for WordPress, Blogger...