Pages

Showing posts with label Christmas. Show all posts

Saturday, September 14, 2013

Christmas Advent Craft

Guess what I got the other day?!  A fun new Christmas craft!  I actually got two of them because my little sister is going to do one with me! :)
 
 
I found them at Porter's Crafts - I think it's a local craft store, so I'm not sure where you can get these.  They measure about 16.5"x 16" and the little doors are only 1.5" wide. 
 
You can pretty much do anything you want with these, but the craft store had two different ideas on display.
 
The first is a Nativity advent - very pretty!

 
The second is a cute little Santa one using different craft paper and embellishments...

 
This is the one I'm going to make, because I already have a more religious advent with Mary and Joseph traveling to Bethlehem.  Plus, I want to use up some of my cute Christmas paper!! haha :)
 
I also bought the vinyl they had there, because I didn't want to try to make my own.  I will be cutting out my own numbers, though.
 
We are going to make these in a couple weeks when I go to visit my sister, so I will have to update and show you what we ended up with.  I'm so excited!! :)
 
UPDATE:
Here is the one I made - I LOVE how it turned out!  So cute! :)
We bought the vinyl city scene at the craft store, because I was NOT about to try to do my own! haha  I did make my own numbers on my Silhouette though.  So many fun fonts!

I had so many cute paper scraps, it was so fun to use them.  They look so much prettier in person.  (Some of the paper has glitter on it.)  We stuck it all on with Mod Podge, so it's sealed really well.

My favorite part is the roof!  We painted it gray to match the brick paper we used for the chimney.  Then we hung some little Christmas lights along the edge.  Aren't they ADORABLE??!!  :)
 
 
Anyway, it was a lot of fun to make, and now I get to fill it with cute things! 
Photobucket

Tuesday, November 6, 2012

Castle for Boys

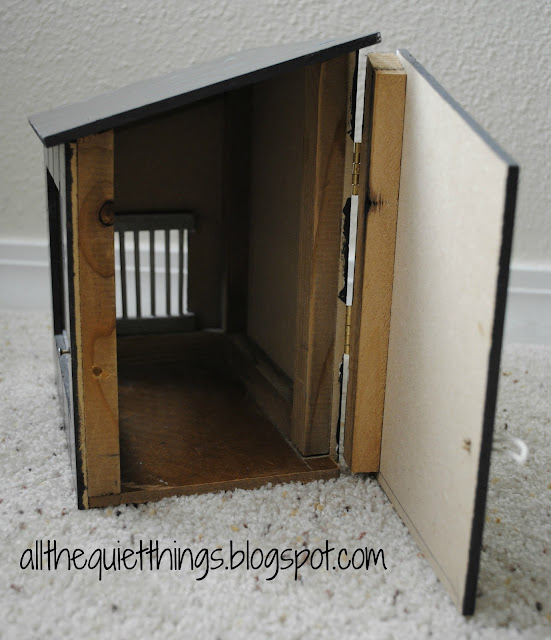
A few years ago, my dad was making a doll house for my sister to give to her daughter for Christmas. I only had boys at the time - not fair, huh? So, I decided I would loooove for him to make a play fort/castle for my son.

Wow! Can I just tell you how AMAZING my dad is??? Check this out...
I wish I had this blog back then, because I would have taken pics along the way, and given you guys the "plans".  (My dad totally made this up as he went.  He's good like that.)
 
He made the entire thing out of scrap wood that he had lying around.  You can see that the walls are made of beadboard - I kind of liked that, it adds texture.  The four corners are made from the tubes that carpet is rolled on.  I guess you can buy those - and they work really well, because they are super thick and sturdy.
 
I did all of the painting, and the added decals are just pictures I stuck on with Mod Podge.  I will try to show you as many of the details as I can.
 
This is the whole thing put together.  One of my main specifications when "we" (haha) were designing this was it needed to be able to come apart, so we could store it. Because lets face it, the thing is HUGE!
 
Here it is all taken apart.  It stacks together nicely and doesn't take up too much room.
 
Here is how the walls fit together.  My dad made 3 notches and the two side walls can fit on either side.  I had him cut a hole in the top and bottom, so the people could have a chute or a dungeon-type thing.  (Have you ever played with the original Fisher-Price Castle?)
 
You can see how scruffy this thing has gotten from being taken apart and played with so many times.  Well, at least it's been well loved, right?
 
This is the back door - I love the little beam-latch-thingy! (Okay, I have no idea what it's called.) 


This is one of my favorite parts - the front gate/drawbridge. My dad rigged up a little pulley system that can raise and lower the gate.  The gate is made out of orangewood sticks.  Very clever, yes?
 
There is also another string that keeps the drawbridge closed.  He attatched them to little screws on the sides.
 
Here is the front with the drawbridge down.
 
This is my other favorite part - my dad made a little prison! One of it's main purposes is to hold all the castle pieces when my son is done playing with them - genius!
 
 
It has a little latch to keep it closed.  The prison bars are also made from orangewood sticks.
 
A little window on the side.  (I think my dad had as much fun making this as my son had playing with it.)
 
I went online and found some crests, torches and windows that I liked, printed them out and just stuck them on with Mod Podge.  I really liked the windows in the towers because they look almost 3D.  I also covered the entire thing in Mod Podge because I liked the subtle texture it gave.
 
I did both of the sides like this.  Really simple - I didn't want too much going on.
 
 
Don't you love my little knights?  I think they're so cute! They are guarding the back door. :)
 
My dad had some old wood that he covered the doors with, and I loved the rustic look of them, so I left them natural.
 
 
Here is a close up of one of the turrets. My dad just glued something inside to hold the circle of wood so the people would have a look-out. He drilled a tiny hole in the middle for me and I glued in a coffee stir straw for the flagpole.  (I needed it to be flexible so it would not impale my son while he was playing - yikes!)   I made the flag out of felt and glued that on, too.
 
 
You can use little castle play pieces, or....
 
Regular army guys work, too.  My son has used anything and everything. :)
 
Here is a picture from Christmas 2009 when it was brand-new.  My dad also made that little ladder, but I can't seem to find it now. (Look how nice and shiny the paint was back then!) haha
 
Here is my 2-yr-old daughter playing in it.  This shows you just how big it is.  We had to take one wall off because she's too short to step over.
 
Notice how the Ninja Turtles are "taking a nap"? Girls can totally play with this too!! haha
 
I really really love this castle! Mostly because my dad made it, and it will be passed down in the future - but I had so much fun painting and "decorating" it.  I kept it hidden and right after my son left for school each morning, I would run get it out and work on it all day.  It was so rewarding to see his face Christmas morning!
 
 
Thank you for stopping by!  Hopefully I can inspire someone to make their own fort/castle - it was so much fun!
Photobucket

Thursday, December 15, 2011

Easy, Handmade Ornaments


I have some more super easy ornaments for you....
The first one is a Cinnamon Stick Santa. You can make a whole bunch of these in a short amount of time. 
I made these soooo long ago, so I don't have step-by-step pictures, but they are pretty easy to figure out.

Things you will need:
cinnamon sticks
twine
red and peach craft paint
black craft paint or my preference - a sharpie!
craft snow
hot glue or other craft glue

Instructions:
1.  Paint the top portion of the cinnamon stick red.  I only painted the front half, because the back doesn't snow anyway. You decide how big or little you want the hat to be.
2.  Paint just underneath that peach - I went longer on this part than the red. Let these dry.
3.  Glob on the craft snow to make Santa's hat, hair & beard. (yes, that's my technical term - glob - seems to fit don't you think?) I went just under the hat, down both sides and made a little moustache in the middle. Oh, and don't forget a little dab on the top of his hat.
4.  Let that sit and dry really well.
5.  Make 2 black dots for his eyes.
6.  Cut a little piece of twine and got glue it onto the top of the cinnamon stick.

Here is a better picture of them together:

I hope that I explained these good enough for you.  I made a couple dozen and they are such cute fillers for my tree.  You could also hang them on packages - super cute!

Here is a picture of the kind of craft snow I used:


The next ornament I have for you is another one I made forever ago.  I'm sure you've seen these around, but they are such classics - I think they look sooo good on any tree, or as gift tags:

Cinnamon Cookie Cutter Ornaments.

I LOVE these! I still have these after probably 15 years - and they STILL smell yummy - seriously!

Warning!! Do NOT eat these - for decoration only.  Not that you would, they have glue in them, but just to make sure... ;)


Here is the recipe:

1 cup cinnamon
3/4 cup applesauce
3 TBS white glue (Elmer's)

Mix all ingredients together and knead until you get a soft consistancy. (kind of a "furry" look)

Roll the dough out making sure you keep an even thickness - I made mine pretty thick because I didn't want them to break.

Cut out shapes with a cookie cutter. 

Make sure to poke out your holes while the dough is still wet.  A straw is the easiest way to do this.

Let them sit somewhere undisturbed to dry. It takes about 3 days.  (I know, it's a long time, but it's really worth it.)

Hang with ribbons.

You can store these with your decorations to use year after year!


Well - I hope you like these ornaments as much as I do!


Photobucket

Wednesday, December 14, 2011

Neighbor Gifts

These are my neighbor gifts this year.  I just went and got some hand soap, (the green one is a scrub I got at the dollar store) removed the labels and added some contact paper that I cut with my Silhouette.  If you don't have a cutter, you could easily trace and cut a simple shape out of contact paper with scissors.

Then I added ribbon and simple little tags. Sooo easy, and pretty cheap, really. Now, I just need to make about 12 more!


Thanks for stopping by,
Photobucket

Monday, December 12, 2011

Family Ornaments 2011

 
Every year, we give our kids an ornament. Then, when they are all grown up, they will have a box of ornaments that have special meaning to each of them. (And - I will finally get my "beautiful" tree.)

No, I'm just kidding - I love my tree with all the different ornaments all over it. It's so much more fun to look at and talk about.

 
So I got these plain, glass ornaments a couple years ago at Michael's for like $1 each. I bought 3 round ones and 3 snowflake ones. Well, I never did anything with them, and now we have a baby girl! So I decided to do all the boys' round, and my daughter got the snowflake.

All I did was cut out circles and their names in black vinyl. (The snowflake ornament was smaller, so I couldn't do the circle with that one.) Then, I cut out their initials in some speckled contact paper that I got at Wal-Mart. Sorry, you can't see it that well in the picture, but it's really pretty.


Then, I just added the year to the back in black vinyl. I just left the gold ribbon on them that came with the ornaments. I might swap the ribbon out later, but I think it goes really well.


I love them! I think they turned out really great - especially for only $4!
Related Posts Plugin for WordPress, Blogger...