Pages

Showing posts with label recipes. Show all posts

Thursday, February 27, 2014

Blue and Gold Cake - Olympic Theme

It's that time of year again - Blue and Gold Banquet for Cub Scouts!!  This is the last year I will have to make a cake, because my youngest son will turn 11 in 2 weeks!  I'm a little sad, but mostly excited. haha :)
 
Well, the theme this year is the Olympics!  So fun!  We decided we wanted to do torches for our cake this year.  Way easier than decorating a cake, in my opinion.  :)
 
We baked cupcakes in sugar cones, made little Olympic papers to wrap them in, and then just squirted frosting on top - super easy, huh?
 
Here's how they turned out....
 
 
Okay, the really hard part, was finding something to hold them all in.  I tried cutting holes in a disposable pan, (That was how I baked them.) but then remembered we had this handy little put-together organizer thingy.  It's a little big - not sure what that will look like on the cake table, but it saves me a HUGE headache!  Whew!


Here is how I baked them...

 
One little tip - DO NOT FILL THE CONES TOO FULL!!  My first batch looked like volcano cupcakes instead of torches.  Not pretty.  You will want to fill them only 1/2 way full - leave a good 2 inches or more because they seriously expand!  Also make sure they are standing straight up - that helps too.  I baked them at 325 F for about 15 minutes.
 
I just used a box cake mix, and a can of lemon frosting.  I added a couple drops of red food coloring in and didn't even really stir it, just scooped it into my frosting bag.  It turned out a little pinkish in spots, but it looked way better than the yellow plain.  I added red sprinkles on top and that was it!

 
Well that's it!  I am also in charge of a little Olympic craft, so I bought a package of large craft sticks, and I am having the boys design and decorate their own "snowboards" using markers.  I think it will be fun for them to do, and pretty easy for me!
 
Let the games begin!  Thanks for stopping by!  :)
 
Photobucket

Friday, April 26, 2013

S'mores On A Stick

These are the treats I made for our Young Women's Camp Kickoff. They turned out really cute, and apparently they were delicious, too.  :)
 
 
Here is what you need:
 
pretzel rods
jumbo marshmallows
1 pkg chocolate chips (I used milk chocolate)
vegetable shortening
graham crackers
 
Carefully push the pretzel rods into the center of the marshmallows until they almost poke through, then lift up slightly so they are secure.
 
Put some graham crackers in a ziploc bag and crush with rolling pin until crumbs are fine.  Pour into small bowl.
 
Melt 1/2 the bag of chocolate chips with a couple tablespoons of shortening in the microwave.  Stir until smooth.
 
Dip the marshmallows into the melted chocolate, and roll in graham crackers.  If you are making more, you can repeat with the other half of the chocolate chips.  (I made about 24, and I used all the chocolate!)
 
I set them in a cup and put it in the fridge until the chocolate was set. 
 
You can serve them just like that if you want - I put them in individual plastic bags...
 
and then I displayed them in these cute buckets!  Fun, huh?  (They looked much better in person.)
 
Thanks for stopping by!
Photobucket

Tuesday, September 25, 2012

2 Week "Power Cooking"

I have done what I call "Power Cooking" for years, but it was always for myself. (Chicken breasts, sweet potatoes, etc. so I could have healthy food to eat during the week.)
 
I never thought of doing it for my family! Ha! Well, people have inspired me - and I thought I would finally give it a go. :)  I have teenage boys in sports/school activities, a husband who works late, a 9 year-old and a 2 year-old who can't wait that long for dinner.  It was really hard to make dinner when everyone eats at different times!
 
So after reading lots of blogs and checking out books from the library - I decided to start small and just try the 2 week meal idea first. 
 
My family is not big on repeats, unless I have a few weeks in between, so I actually printed out a blank calendar and made a 6 week menu.  I made 11 meals for the freezer (we'll have baked potatoes, hoagies, etc. on the other nights, so I didn't need to freeze anything for that.)  So some of the meals that I had doubled, will actually be used later in the month.
 
Note: These are not complete meals that you just take out of the freezer and cook.
I decided I wanted to use my family's favorite meals, that I would be making normally, but just figure out a way to make them easier and have most of the cooking done ahead of time.
 
These look really gross, sorry - I took the picture after everything was frozen. I was worried that they would sit out too long otherwise.
 
Next time I do my power cooking, I think I will do a whole month (yikes!) and see how that works. :o
 
Here is my menu:
Pork Tenderloin (2 meals)
Old-Fashioned Chicken Noodle Soup - I froze just after you shred the chicken, before you add noodles and milk.
Beef Enchiladas (Just the filling, because the tortillas get really soggy if you make it first and freeze it. Trust me - yuck!)
Chicken Marinade (2 meals worth) - I just froze the chicken right in the marinade, so it will marinate as it thaws and then we just throw it on the grill!
Pasta e' Fagioli Soup - As with the chicken soup, I froze it before adding the pasta.  I will just let both soups simmer and warm up awhile first.
Baked Potatoes with Chili
Lasagna (2 pans) - Assemble and freeze in a disposable pan.  Easy peasy.
Chicken & Wild Rice Soup (I froze the chicken and veggies to assemble in the crock pot.)
Hoagies
Tacos (Meat only) - Brown meat, add seasonings, cool and freeze.
California Wild Rice Salad (I froze the cooked, shredded chicken only, for this recipe.)
Potato and Ham Chowder - Could freeze the chopped onions and ham - I didn't.
Homemade Mac-n-Cheese (my kiddos LOVE it)
1 night to eat out - when I do my next day of Power Cooking!!
 
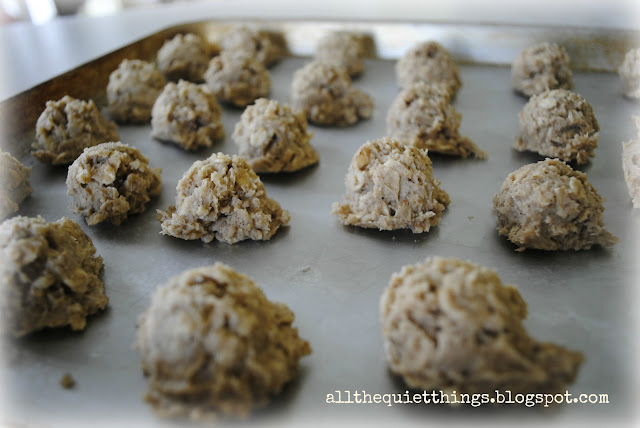
I even went crazy and cooked bacon to freeze and also made cookies! (I freeze the dough in balls, so we can just pop them in the oven anytime.)
 
 
Okay, so I just made the oatmeal cookies today - whatever. haha :) I think I will always freeze extra any time I am in the 'baking mood', especially for the holidays! 
 
So you see that nothing repeats, and I actually have some meals to use for next time!  Yay!
 
I am really excited to do this again - it's kind of fun to have all the hard work over and done with.
 
It only took me about 4 hours, but I will say that my back was killing me and the kitchen was a total mess! haha
Which is why I plan on eating out the night I do my power cooking! :)


Have fun cooking, everyone!!
Photobucket

Friday, April 6, 2012

Healthy Desserts! Seriously!

Oh man!  I am seriously excited about these healthy dessert recipes!!  I am trying to eat better and lose weight, and it is sooo hard to get all my protein in.  (When I really just want dessert!)  Did you know that you should be getting 1 gram of protein for every pound you weigh?  That's a lot of protein - and I'm always looking for more creative (and delicious) ways to do that.

Enter these next two recipes....

Healthy Peanut Butter Dip.  When I first made this recipe, it was supposed to be more like a peanut butter cookie dough.  I added too much water though, so it ended up with more of a caramel texture and flavor.  It was super good, but a little too sweet on it's own so I made it into an apple dip. 

You have got to try this!!  Sooooo good!  And it's a complete meal - protein, carb and a little peanut butter fat.  (I don't think peanut butter counts as a healthy fat, but hey. Whatever.) haha  :)


Ingredients:
1 scoop vanilla protein powder
1 TBS all-natural peanut butter
1 1/2 TBS water (if you want it like cookie dough, just use 1 TBS water)

Directions:
Add all ingredients together in a small bowl, and stir until smooth.

Serve with chopped apples or celery - enjoy!


The next recipe has two different ways to make it....
The first way is a Protein-Packed Pudding.  Sounds like a tongue twister - tastes like fudge sauce!  Wow!  You seriously feel like you are eating something super bad for you!  Chocolate heaven... ahhh.  :)

When I first made this, again - I added too much water.  (I was following the recipe - sooo not my fault this time!)  It was more like soup than pudding, so I put it in the freezer for awhile.  Then, I scooped it out into a dish and it was magic protein ice cream!  Even better than my Healthy Ice Cream because it's chocolate - hello!
 Nice little evening snack I must say!

Ingredients:
2 scoops chocolate protein powder
1 TBS all-natural peanut butter
1/4 cup water

Directions:
Add all ingredients together in small bowl and stir until smooth.  Freeze if you want ice cream, otherwise - enjoy!

Note:  Since this recipe has two scoops of protein powder in it - you might want to split it into two servings.  Especially if you're watching calories.  My protein powder has about 130 cals per scoop.

Photobucket

Thursday, March 22, 2012

Easter Egg Cakes

I decided I had to share a little Easter treat with you today...
These are delicious little Easter Egg Cakes that my sister-in-law makes every year. 
We loooove them!  I seriously start craving these every spring. 

So this year, I got myself an egg-shaped cupcake pan and decided to try making my own.  They didn't turn out quite as beautiful as hers. *sigh* (My excuse is that she's been doing this for years, and has it down!) haha :)  However, they tasted ah-ma-zing!

They look just like eggs, huh?  Except way yummier!

Let me tell you why I love them so much...
They're not too sweet.  They're very portable - no messy wrappers when you want to eat one. 
The bottom of the egg (shell) is covered in blue butter glaze, and the yolk is lemon curd.  In fact,  I like the lemon so much that when I got to the last couple of cakes I gave them double yolks - just for fun.  I was kind of tempted to just cover the whole thing in lemon curd - but that's just silly. :)

Ingredients:
Cakes:
1 box white cake mix (plus all ingredients listed on back of box)
1 (1 oz) box vanilla instant pudding mix

Lemon Curd:
3 large egg yolks, strained
zest of 1/2 lemon
1/4 cup lemon juice
6 TBS sugar
4 TBS unsalted butter, cold, cut into pieces

Place a strainer over a small saucepan, and add egg yolks. Press with a spoon until they're all strained through. Add lemon zest, lemon juice and sugar. Whisk to combine. Stir constantly over medium heat with a wooden spoon, making sure to stir sides and bottom. Cook until mixture is thick enough to coat back of wooden spoon. (about 5-7 minutes)
Remove saucepan from heat. Add butter, one piece at a time, stirring until consistency is smooth.
Transfer mixture to a medium bowl. Lay a sheet of plastic wrap directly on the surface of the curd to avoid a skin from forming; wrap tightly. Let cool, and refrigerate until firm and chilled, at least 1 hour.


Butter Glaze:
3 TBS milk
2 cups sifted powdered sugar
1/2 cube (1/4 cup) unsalted butter
food coloring

Pour milk into small bowl, and stir in food coloring until the desired shade is reached; set aside. 

Place powdered sugar in large bowl and set aside.

Melt the butter in small saucepan over medium heat.  Remove pan from heat and immediately pour butter into the bowl with the powdered sugar.  Add milk, and whisk until smooth.  You may need to add milk if it's too thick or more sugar if it's too thin.  Just play around with it until it is the right consistency.  Think glaze not frosting - it should be on the runny side.


Instructions:
This recipe worked out perfectly because the cake mix called for 3 egg whites and the lemon curd called for 3 egg yolks - sweet!

Pour the cake mix and pudding mix into a large bowl.  Add the ingredients it calls for on the box making sure that the water you add is HOT.  Follow directions to make the cake mix.

Make the lemon curd (see above) and refrigerate it.

Preheat oven to 350 F.  Spray cake pan and add a small spoonful of batter - don't fill even halfway or the tops will be too rounded. (Trust me, my first batch looked like little footballs instead of eggs!) haha

Bake for 16-18 minutes.  Watch them carefully! Take them out when the tops start to spring back when touched and they are not quite golden.

Lay them face down on a cooling rack and let cool completely.

Make the butter glaze. (see above)  Dip/roll bottoms of cakes in glaze and lay face down on a cooling rack until the glaze has set.  (You'll want to put something underneath to catch all the dripping glaze.)

After the glaze had dried completely - flip the cakes over onto a plate.  Spoon the lemon curd into a pastry bag and squirt a small circle onto each cake so it resembles egg yolks.

Sprinkle all cakes with powdered sugar.

Enjoy! :D

Check out all this craziness!


Photobucket

Tuesday, January 3, 2012

Healthy Ice Cream


Okay, seriously - Is it already time to start eating healthy again?? I ate soooo bad over the holidays, and the one thing I ate a lot of was ice cream! So when I started thinking about getting back to eating a healthier diet - I remembered this recipe. I originally got this from Bill Phillips' Eating For Life. (An amazing book for healthy recipes!)

Anyway, I used to make this "fake" ice cream all the time, but I had forgotten about it until recently. It really does taste just like ice cream!

The secret ingredient is: frozen bananas! That's it! It's great because whenever you're bananas start to get a little over-ripe and you don't think you'll eat them - peel them and stick them in the freezer to use as ice cream later.

Ingredients:
1/2 c skim milk
1 scoop vanilla protein powder (optional, but hello? added protein!)
2 c frozen banana slices (about 2 medium bananas)

Toppings:
4 tsp sugar-free chocolate syrup
4 TBS fat-free whipped topping
2 tsp chopped nuts

Directions:
Pour skim milk into blender. Add protein powder and blend on high speed for about 15 seconds.
Add frozen bananas and blend until smooth.

Serves 2

Note: Immediately after blending, this resembles more of a soft-serve ice cream. However, if you want to make it ahead of time and put it back in the freezer, it will firm up a bit more like regular ice cream.


Chunky Monkey Variation:

You can add all kinds of fruit and different things to this 'Healthy Ice Cream' recipe (see below) - but one of my favorites is the Chunky Monkey version.

Ingredients:
1/4 c skim milk
1 scoop vanilla protein powder (gotta add that protein in) haha :)
1 peeled and frozen bananas
1 TBS peanut butter
2 TBS chopped walnuts
1 TBS mini chocolate chips

I mix this all together and then separate it into 2 servings - those calories add up!!  Then, I put them in the freezer and pull it out when I'm really craving something sweet.

Other Variations:
Strawberry Banana - Add frozen strawberries (I tried replacing the bananas with strawberries and it didn't turn out very well for me, so I just add them in with the bananas)

Tropical Blizzard - Add coconut and pecans

Chocolate Banana - Add sugar-free chocolate syrup - or - chocolate protein powder! (am I selling you the protein powder idea, yet?)

Well, I'm sure you get the idea.... :D
Get out there and experiment! (and let me know what you come up with)

PS - I posted a copy of this recipe over on my food blog girls and their meals - there are some great recipes over there - go check it out!

Enjoy!
Photobucket


Related Posts Plugin for WordPress, Blogger...